Submitted by The Fan Club on
There are several tools available to copy and install IMG and ISO files to memory cards and removable storage, but I was looking for something that could easily backup and restore disk image files for my Raspberry Pi, as well as create bootable Linux installation USB drives from ISO's with macOS as well as Ubuntu.
I also wanted a program that could write compressed IMG files directly to the memory card without the need to decompress the image files first. dd the command line utility has been my default choice for years, but lacked a GUI that fit my requirements and so I decided to write my own - that is how dd Utility came to be.

Open Source project. Code available on GitHub
Features
-
Write disk image files to memory cards and removable storage.
-
Create bootable USB stick from ISO files of Linux installations.
-
Backup and Restore IMG files to memory card and disk.
-
Install and Restore compressed disk image files on the fly. Supported file formats: IMG, ISO, Zip, GZip and XZ.
-
Backup and compress disk image files on the fly to significantly reduce the file size of backups.
-
Drag and Drop Backup and Restore.
-
Ideal for flashing IMG files to SD Cards for use with Raspberry Pi, Arduino, BeagleBoard and other ARM boards.
Requirements
- Ubuntu Linux and macOS supported
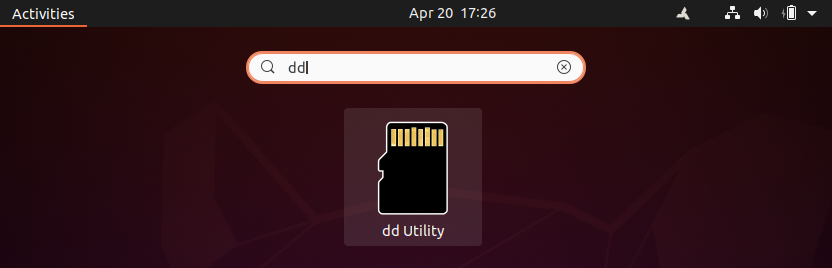
Instructions - Ubuntu
- Download the dd Utility DEB installation file from the link provided at the bottom of this page or from our GitHub project download page.
- Double click on the DEB file to open and install with the Ubuntu Software Center, or from the command line on other Debian based distros with:
sudo dpkg -i ddutility_1.6_all.deb ; sudo apt install -f- Select dd Utility from your Dash or Applications menu to start.
- Ubuntu User Guide can be found here
Instructions - macOS
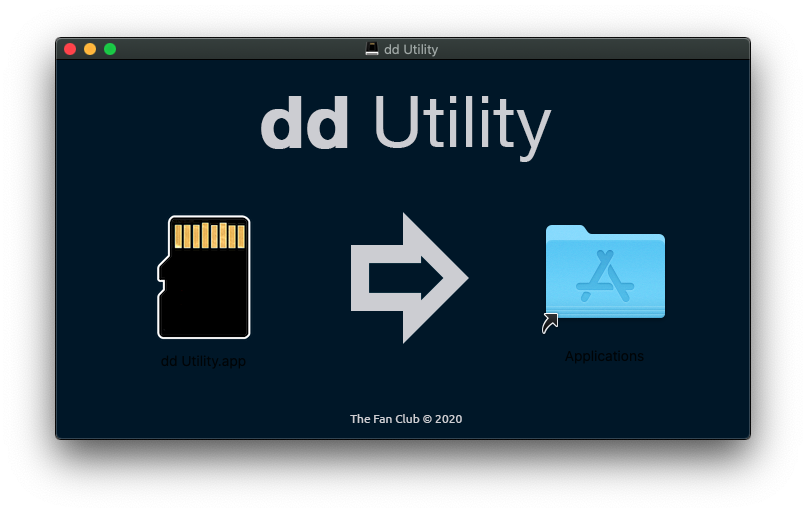
- Download dd Utility DMG installation file from the link provided at the bottom of this page or from our GitHub project download page.
- Double click on the DMG file to open and drag the dd Utility icon to the Applications folder as shown below.
- Select dd Utility from your Applications folder to start.
- macOS User Guide can be found here.
Ubuntu User Guide
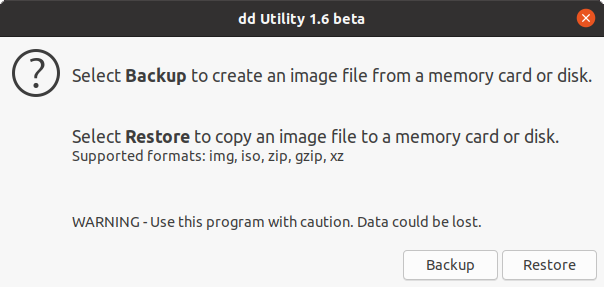
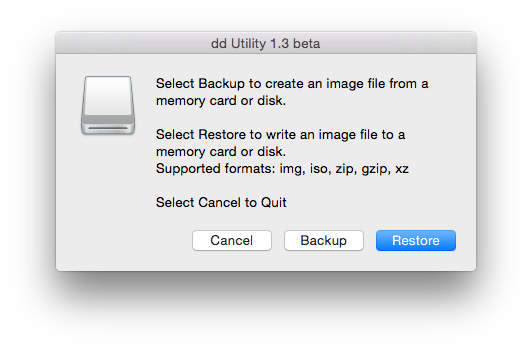
Restore or write IMG and ISO files to memory card or disk
- Select dd Utility from your Dash or Applications menu to start.
- NOTE : You can also Drag and Drop a image file on the dd Utility app icon to restore.
- You will be asked to enter your password to start the process. Administrator rights is needed to write the image file to the memory card.
- Select Restore
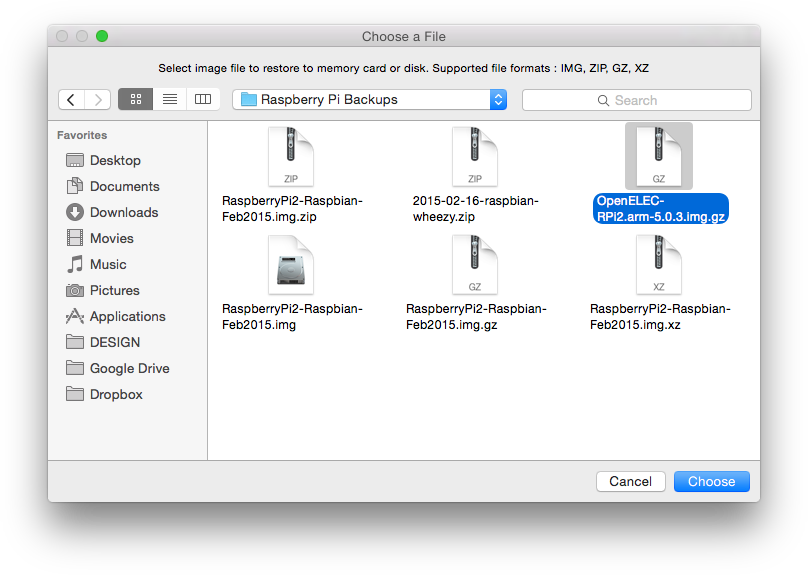
- Select the IMG or ISO file you would like to restore/write to your memory card or disk. Supported file formats include .img, .iso, .zip, .gz and .xz
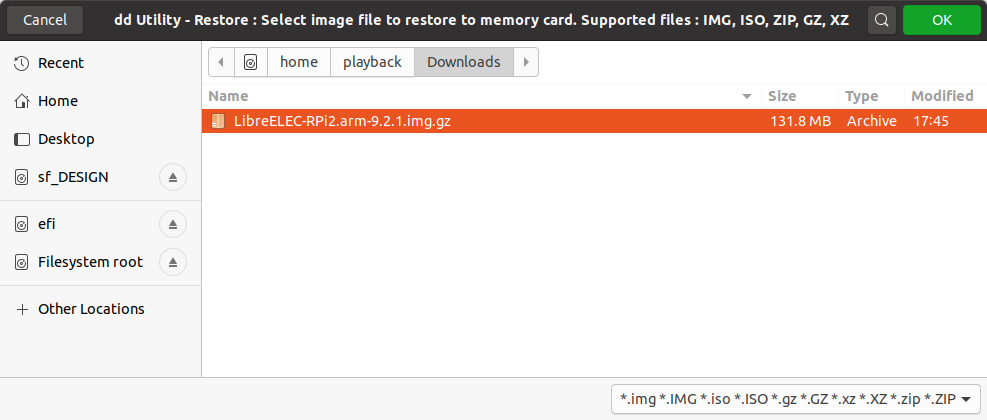
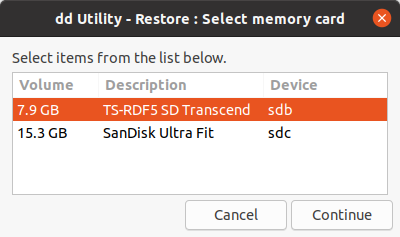
- Make sure your memory card is inserted in your card reader and select it from the next screen. No need to format the card.
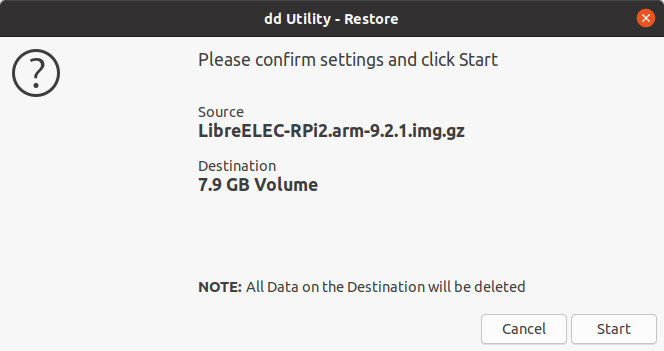
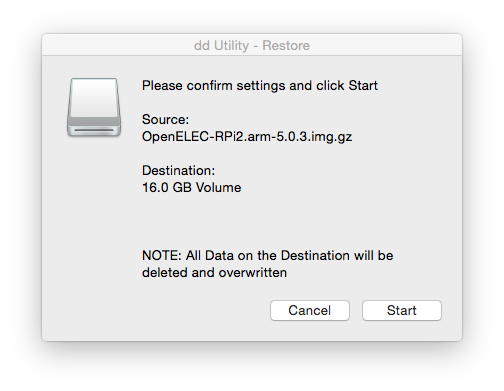
- Confirm the settings and click Start to begin the process of writing the image file to the memory card.
- NOTE: All data on the memory card will be overwritten and replaced by the image file data.
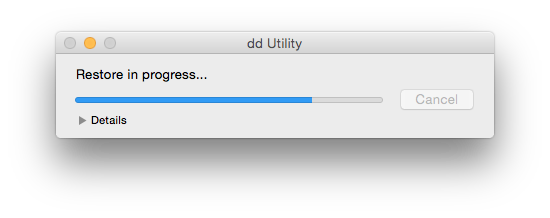
- Once the process has started, it can take minutes to hours depending on the size of the image files, the speed of the memory card and compression used.
- Be patient and wait for the process to complete.
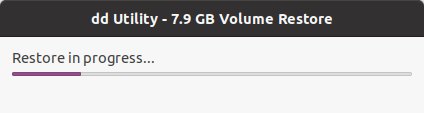
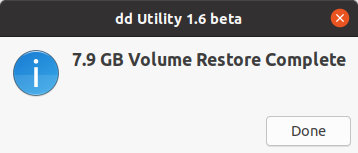
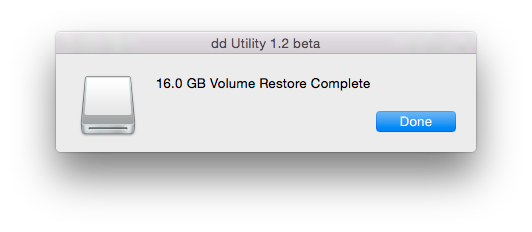
- Wait until the restore is complete before removing your memory card.
- If all went well you should see:
Backup Memory Card to IMG file
- Start dd Utility from the Dash or your Applications menu.
- NOTE : You can also Drag and Drop a Disk Volume on the dd Utility app icon to backup.
- You will be asked to enter your password to start the process. Administrator rights is needed to read the image file from the memory card.
- Select Backup
- Make sure your memory card is inserted in your card reader and select it from the next screen. No need to format the card.

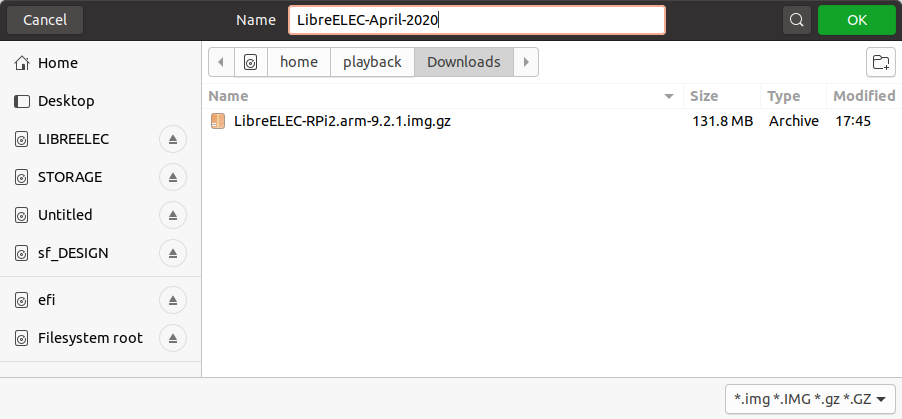
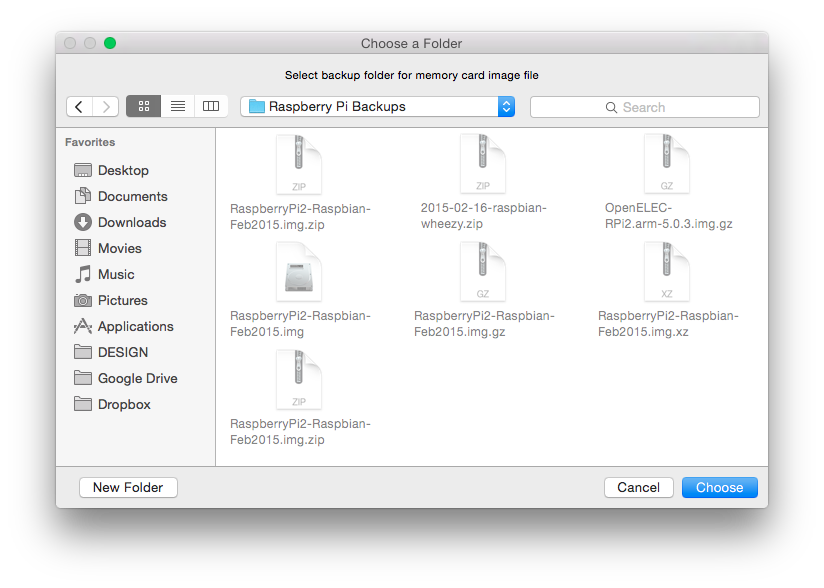
- Next select the Backup folder location.
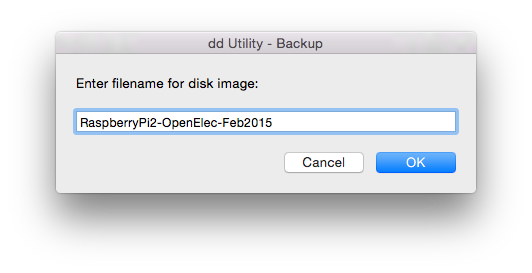
- Enter the filename and folder of your backup. You do not need to specify a path or extension for the file.
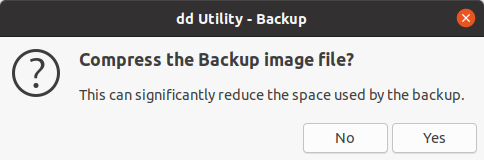
- You then have the option to select to compress the backup on the fly. This option will take a bit longer to complete, but the file size will be greatly reduced.
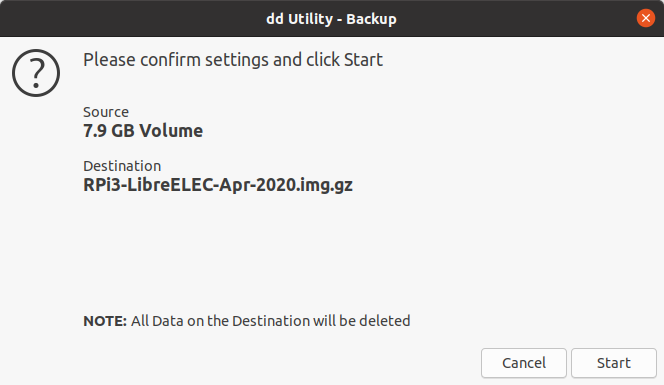
- Next confirm the backup settings and click Start.
- Once the process has started, it can take minutes to hours depending on the size of the image files, the speed of the memory card and compression used.
- Be patient and wait for the process to complete.
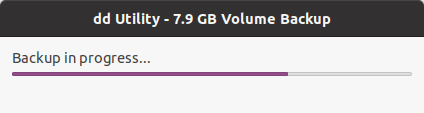
- Wait until the backup is complete before removing your memory card.
- If all went well you should see:

macOS User Guide
Restore or write IMG or ISO files to memory card or disk
- Start dd Utility from your Applications Folder.
- NOTE : You can also Drag and Drop a image file on the dd Utility app icon to restore.
- You will be asked to enter your password to start the process. Administrator rights is needed to write the image file to the memory card.
- dd Utility uses macOS Keychain authentication.

- Select Restore
- Select the IMG or ISO file you would like to restore/write to your memory card or disk. Supported file formats include .img, .iso, .zip, .gz and .xz
- Select your memory card from the next screen. No need to format the card.

- Confirm the settings and click Start to begin the process of writing the image file to the memory card.
- NOTE: All data on the memory card will be overwritten and replaced by the image file data.
- Once the process has started, it can take minutes to hours depending on the size of the image files, the speed of the memory card and compression used.
- Be patient and wait for the process to complete.
- If all went well you should see:
Backup Memory Card to IMG file
- Start dd Utility from your Applications Folder.
- NOTE : You can also Drag and Drop a Disk Volume on the dd Utility app icon to backup.
- You will be asked to enter your password to start the process. Administrator rights is needed to read the image file from the memory card.
- dd Utility uses OS X Keychain authentication.
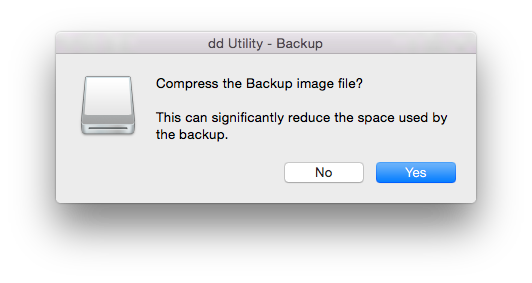
- Select Backup
- Select your memory card from the next screen. No need to format the card.

- Enter the filename of your backup. You do not need to specify a path or extention for the file.
- Next select the Backup folder location.
- You then have the option to select to compress the backup on the fly. This option will take a bit longer to complete, but the file size will be greatly reduced.
- Next confirm the backup settings and click Start.
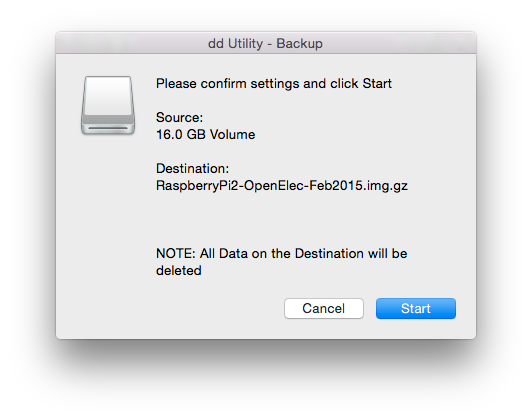
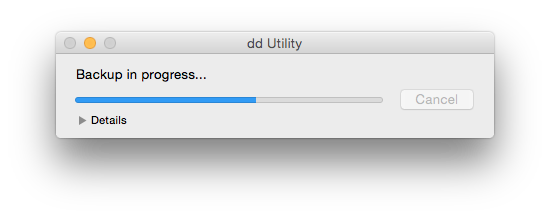
- Once the process has started, it can take minutes to hours depending on the size of the image files, the speed of the memory card and compression used.
- Be patient and wait for the process to complete.
- If all went well you should see:

Download:
| Attachment | Size |
|---|---|
| 173.36 KB | |
| 3.95 MB |


