Submitted by The Fan Club on

This guide is based on various community forum posts and webpages. Special thanks to all. All comments and improvements are very welcome as this is purely a personal experimental project at this point and must be considered a work in progress.
This guide is intended to be part 2 of How to setup an Ubuntu Business Box Server
For more information see How to setup an Ubuntu Business Box Server - UBB Part 1
15. Install Email and Database Server - Postfix | Courier | MySQL
Install the following programs and answer as follow to the questions asked:
sudo apt-get install postfix postfix-mysql postfix-doc mysql-client mysql-server courier-authdaemon courier-authlib-mysql courier-pop courier-pop-ssl courier-imap courier-imap-ssl libsasl2-2 libsasl2-modules libsasl2-modules-sql sasl2-bin libpam-mysql openssl getmail4 binutils maildrop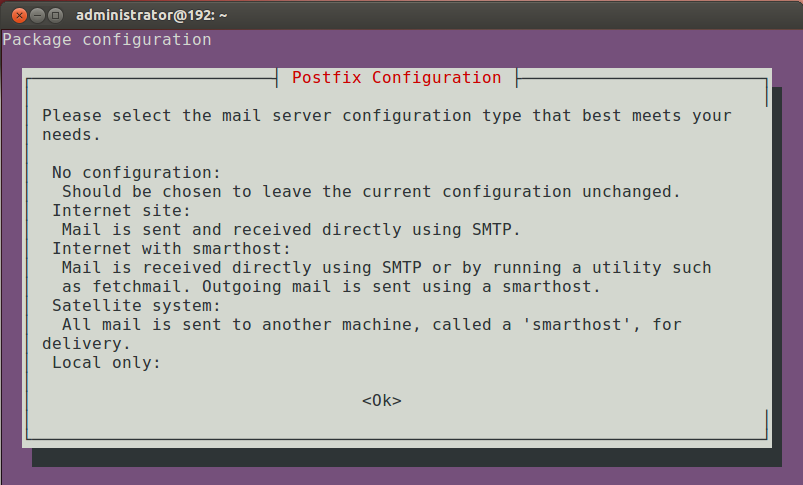
Use TAB key and ENTER to make selections. Answer the questions shown below.
- New password for the MySQL "root" user: ENTER YOUR ROOT PASSWORD
- General type of mail configuration: Internet Site
- Create directories for web-based administration: No
- System Mail Name: ubb01.mydomain.local (Enter Your FQDN Name from part 1)
After installation we need to change a few settings.
- Comment out bind-address in /etc/mysql/my.cnf with a text editor or open a terminal and do it with sed:
sudo sed 's/bind-address/#bind-address/g' /etc/mysql/my.cnf > /tmp/.my.conf
sudo mv /etc/mysql/my.cnf /etc/mysql/my.cnf.backup
sudo mv /tmp/.my.conf /etc/mysql/my.cnf- Then restart MySQL
sudo service mysql restart- Set Mail Domain name and Fix Courier SSL certificates by first deleting the old default certificates.
cd /etc/courier
sudo rm -f /etc/courier/imapd.pem
sudo rm -f /etc/courier/pop3d.pem- Then change the mail host name
sudo sed 's/CN=localhost/CN=ubb01.mydomain.local/g' /etc/courier/imapd.cnf > /tmp/.imapd.conf
sudo mv /etc/courier/imapd.cnf /etc/courier/imapd.cnf.backup
sudo mv /tmp/.imapd.conf /etc/courier/imapd.cnf
sudo sed 's/CN=localhost/CN=ubb01.mydomain.local/g' /etc/courier/pop3d.cnf > /tmp/.pop3d.conf
sudo mv /etc/courier/pop3d.cnf /etc/courier/pop3d.cnf.backup
sudo mv /tmp/.pop3d.conf /etc/courier/pop3d.cnf- Then create new mail SSL certificates
sudo su
mkimapdcert
mkpop3dcert
service courier-imap-ssl restart
service courier-pop-ssl restart
exit
16. Install AntiVirus and AntiSpam
Open a terminal window and enter:
sudo apt-get install amavisd-new spamassassin clamav clamav-daemon zoo unzip bzip2 arj nomarch lzop cabextract apt-listchanges libnet-ldap-perl libauthen-sasl-perl clamav-docs daemon libio-string-perl libio-socket-ssl-perl libnet-ident-perl zip libnet-dns-perl - We can stop spamassassin as amavisd loads this internally.
- Open a Terminal Window and enter the following :
sudo service spamassassin stop
sudo update-rc.d -f spamassassin remove
17. Install Webserver - Apache | PHP | PHPMyAdmin
- Open a terminal window and enter:
sudo apt-get install apache2 apache2.2-common apache2-doc apache2-mpm-prefork apache2-utils libexpat1 ssl-cert libapache2-mod-php5 php5 php5-common php5-gd php5-mysql php5-imap phpmyadmin php5-cli php5-cgi libapache2-mod-fcgid apache2-suexec php-pear php-auth php5-mcrypt mcrypt php5-imagick imagemagick libapache2-mod-suphp libruby libapache2-mod-ruby php5-dev php-pear makeYou will be asked the following questions:
- Web server to reconfigure automatically: apache2
- Configure database for phpmyadmin with dbconfig-common: No
- Then open a Terminal Window and enter the following :
sudo a2enmod suexec rewrite ssl actions include dav_fs dav auth_digest proxy proxy_http headers
- Restart Apache :
sudo service apache2 restart18. Install FTP sever - ProFTP
- Open a terminal windows and enter:
sudo apt-get install proftpd proftpd-mod-mysql openssl
- You will be asked which mode to run ProFTP - Run proftpd: Standalone
- Edit the file /etc/proftpd/proftpd.conf
sudo gedit /etc/proftpd/proftpd.conf- Add the following three lines and save:
Include /etc/proftpd/tls.conf
DefaultRoot ~
ServerIdent on "FTP Server ready."
- Create SSL Certificate for TLS FTP support
sudo mkdir /etc/proftpd/ssl
sudo openssl req -new -x509 -days 365 -nodes -out /etc/proftpd/ssl/proftpd.cert.pem -keyout /etc/proftpd/ssl/proftpd.key.pem- The edit the /etc/proftpd/tls.conf file and add this to the end and save:
<IfModule mod_tls.c>
TLSEngine                  on
TLSLog                     /var/log/proftpd/tls.log
TLSProtocol                SSLv23
TLSOptions                 NoCertRequest AllowClientRenegotiations
TLSRSACertificateFile      /etc/proftpd/ssl/proftpd.cert.pem
TLSRSACertificateKeyFile   /etc/proftpd/ssl/proftpd.key.pem
TLSVerifyClient            off
TLSRequired                off
</IfModule>- Restart ProFTP Server
sudo service proftpd restart19. Enable and configure Firewall - ufw
- ufw firewall is installed by default on Ubuntu 12.04.
- gufw is a handy GUI frontends for ufw to manage the firewall.
- Install on your system by opening a terminal windows and enter:
sudo apt-get install ufw gufw- Then enabe ufw. Open a terminal window and enter :
sudo ufw enable- Then open ports for various servers and services running on the server.
- Enter one at a time from a terminal window to add the rules, or use gufw to open the ports :
sudo ufw allow 21/tcp    # ftp
sudo ufw allow 22/tcp    # ssh
sudo ufw allow 25/tcp    # smtp
sudo ufw allow 53/tcp    # domain
sudo ufw allow 80/tcp    # http
sudo ufw allow 110/tcp   # pop3
sudo ufw allow 139/tcp   # netbios-ssn samba
sudo ufw allow 143/tcp   # imap
sudo ufw allow 443/tcp   # https
sudo ufw allow 445/tcp   # microsoft-ds samba
sudo ufw allow 631/tcp   # cups
sudo ufw allow 993/tcp   # imaps
sudo ufw allow 995/tcp   # pop3s
sudo ufw allow 3128/tcp  # squid-http
sudo ufw allow 3306/tcp  # mysql
sudo ufw allow 4190/tcp  # SOGo sieve
sudo ufw allow 5900/tcp  # x11vnc
sudo ufw allow 8800/tcp  # DAV
sudo ufw allow 10000/tcp # webmin
sudo ufw allow 10024/tcp # smtp amavis
sudo ufw allow 11211/tcp # memcached
sudo ufw allow 20000/tcp # http-proxy
- After reboot make sure that ufw is loaded. Open a terminal window and enter :
sudo ufw status20. Install Groupware Email Contacts and Calander - SOGo
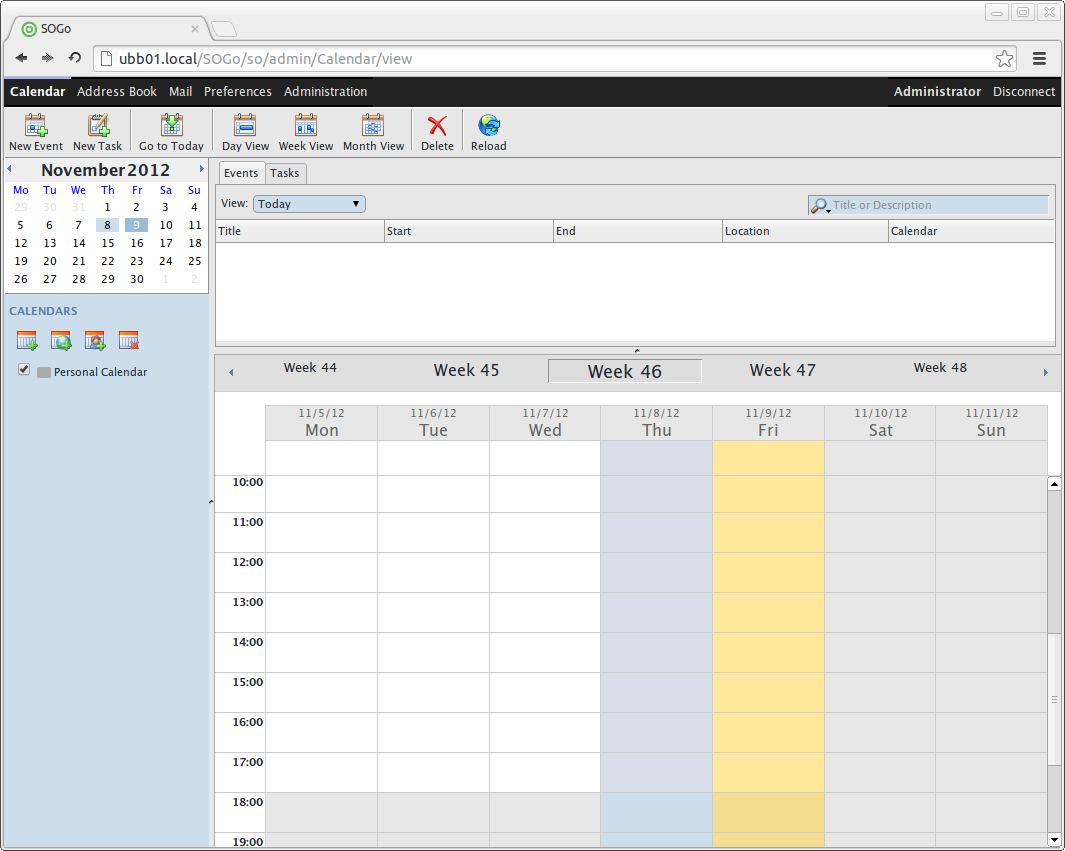
- SOGo is a very impressive open source groupware project, with many features and options to enable mail, contact and calendar sharing support.
- Complete setup of SOGo currently falls beyond the scope of this guide due to the vast configuration options available.
- The installation instructions presented here are very specific for using MySQL as database for SOGo and as an User Source.
- Complete documentation available on the SOGo website. And this good SOGo Debian Wiki guide which these instructions are based on.
- Start by adding the software source and install. Open a terminal window and enter:
sudo apt-key adv --keyserver keys.gnupg.net --recv-key 0x810273C4
sudo su
echo "deb http://inverse.ca/ubuntu precise precise" >> /etc/apt/sources.list
exit
sudo apt-get update
sudo apt-get install sogo sope4.9-gdl1-mysql memcached rpl- Ignore all installation errors and fix some things with the commands below:
sudo rpl 'SHOWWARNING=true' 'SHOWWARNING=false' /etc/tmpreaper.conf # suppress tmpreaper warnings
sudo rpl '127.0.0.1' localhost /etc/memcached.conf # Fix IPv6 errors
sudo service mysql restart
sudo service memcached restart - Setup the SOGo MySQL database and add some demo users. Change sogopasswd for your sogo user password:
sudo mysql -u root -p mysql
mysql> CREATE DATABASE `sogo` CHARACTER SET='utf8';
mysql> CREATE USER 'sogo'@'localhost' IDENTIFIED BY 'sogopasswd';
mysql> GRANT ALL PRIVILEGES ON `sogo`.* TO 'sogo'@'localhost' WITH GRANT OPTION;
mysql> USE sogo;
mysql> CREATE TABLE sogo_users (c_uid VARCHAR(60) PRIMARY KEY, c_name VARCHAR(60), c_password VARCHAR(32), c_cn VARCHAR(128), mail VARCHAR(128));
mysql> INSERT INTO sogo_users VALUES ('paul', 'paul', MD5('zxc'), 'Paul Example', 'paul@mydomain.com');
mysql> INSERT INTO sogo_users VALUES ('piet', 'piet', MD5('zxc'), 'Piet Jansen', 'piet@mydomain.com');
mysql> FLUSH PRIVILEGES;
mysql> quit
- Add Apache modules:
sudo a2enmod proxy
sudo a2enmod proxy_http
sudo a2enmod headers
sudo a2enmod rewrite- Restart Apache
sudo service apache2 restart- Create the SOGo Configuration File changing details according to your setup.
-
After entering the configuration settings below the complete SOGo configuration file, is located in /home/sogo/GNUstep/Defaults/.GNUstepDefaults
sudo su sogo
defaults write sogod SOGoTimeZone "Africa/Johannesburg"
defaults write sogod SOGoMailDomain "mydomain.local"
defaults write sogod SOGoLanguage English
defaults write sogod SOGoAppointmentSendEMailNotifications YES
defaults write sogod SOGoFoldersSendEMailNotifications YES
defaults write sogod SOGoACLsSendEMailNotifications YES
defaults write sogod SOGoLoginModule Calendar
defaults write sogod SOGoSieveScriptsEnabled YES
# sometimes Sieve is running on port 2000, port 4190 is relative new:
defaults write sogod SOGoSieveServer sieve://localhost:4190
defaults write sogod SOGoVacationEnabled YES
defaults write sogod SOGoMailMessageCheck every_5_minutes
defaults write sogod SOGoFirstDayOfWeek 1
defaults write sogod SOGoSuperUsernames '( "admin" )'
# MySQL defaults
defaults write sogod OCSFolderInfoURL "mysql://sogo:sogopasswd@127.0.0.1:3306/sogo/sogo_folder_info"
defaults write sogod SOGoProfileURL "mysql://sogo:sogopasswd@127.0.0.1:3306/sogo/sogo_user_profile"
defaults write sogod OCSSessionsFolderURL "mysql://sogo:sogopasswd@127.0.0.1:3306/sogo/sogo_sessions_folder"
# Set MySQL authentication Usersources
defaults write sogod SOGoUserSources '({canAuthenticate = YES;
  displayName = "SOGo Users";
  id = users;
  isAddressBook = YES;
  type = sql;
  userPasswordAlgorithm = md5;
  viewURL ="mysql://sogo:sogopasswd@127.0.0.1:3306/sogo/sogo_users";
})'
# Use SMTP
defaults write sogod SOGoMailingMechanism smtp
defaults write sogod SOGoSMTPServer localhost

#IMAP config
defaults write sogod SOGoDraftsFolderName Drafts
defaults write sogod SOGoSentFolderName Sent
defaults write sogod SOGoTrashFolderName Trash
defaults write sogod SOGoIMAPServer localhost

exit
- Restart SOGo
sudo service sogo restart- Create new Virtual Host for SOGo and remove SOGo.conf
sudo mv /etc/apache2/conf.d/SOGo.conf /etc/apache2/conf.d/SOGo.conf-backup
sudo su
echo "# disabled" >> /etc/apache2/conf.d/SOGo.conf
exit- Create a new sogo.mydomain.local virtualhost file:
sudo gedit /etc/apache2/sites-available/sogo.mydomain.local Then add the following and save.
<VirtualHost *:80>
   ServerName sogo.mydomain.local
   ServerAlias sogo.local
   DocumentRoot /usr/lib/GNUstep/SOGo/WebServerResources/
   ErrorLog /var/log/apache2/error.log
   Customlog /var/log/apache2/access.log combined
   ServerSignature Off

   Alias /SOGo.woa/WebServerResources/ /usr/lib/GNUstep/SOGo/WebServerResources/
   Alias /SOGo/WebServerResources/ /usr/lib/GNUstep/SOGo/WebServerResources/
   AliasMatch /SOGo/so/ControlPanel/Products/(.*)/Resources/(.*) /usr/lib/GNUstep/SOGo/$1.SOGo/Resources/$2

   <Directory /usr/lib/GNUstep/SOGo/>
      AllowOverride None
      Order deny,allow
      Allow from all
   </Directory>

   <LocationMatch "^/SOGo/so/ControlPanel/Products/.*UI/Resources/.*\.(jpg|png|gif|css|js)">
      SetHandler default-handler
   </LocationMatch>

   ProxyRequests Off
   SetEnv proxy-nokeepalive 1
   ProxyPreserveHost On
   ProxyPass /SOGo http://127.0.0.1:20000/SOGo retry=0

   <Proxy http://127.0.0.1:20000/SOGo>
      RequestHeader set "x-webobjects-server-port" "80"
      RequestHeader set "x-webobjects-server-name" "sogo.mydomain.local"
      RequestHeader set "x-webobjects-server-url" "http://sogo.mydomain.local"
      RequestHeader set "x-webobjects-server-protocol" "HTTP/1.0"
      RequestHeader set "x-webobjects-remote-host" %{REMOTE_HOST}e env=REMOTE_HOST
      AddDefaultCharset UTF-8
      Order allow,deny
      Allow from all
   </Proxy>

   ## We use mod_rewrite to pass remote address to the SOGo proxy.
   # The remote address will appear in SOGo's log files and in the X-Forward
   # header of emails.
   RewriteEngine On
   RewriteRule ^/SOGo/(.*)$ /SOGo/$1 [env=REMOTE_HOST:%{REMOTE_ADDR},PT]

   Redirect permanent /index.html http://sogo.mydomain.local/SOGo

</VirtualHost>

<VirtualHost *:8800>
   # this virtualhost is only for carddav on Mac and not tested very well
   RewriteEngine Off
   ProxyRequests Off
   SetEnv proxy-nokeepalive 1
   ProxyPreserveHost On
   ProxyPassInterpolateEnv On
   ProxyPass /principals http://127.0.0.1:20000/SOGo/dav/ interpolate
   ProxyPass /SOGo http://127.0.0.1:20000/SOGo interpolate
   ProxyPass / http://127.0.0.1:20000/SOGo/dav/ interpolate

   <Location />
      Order allow,deny
      Allow from all
   </Location>

   <Proxy http://127.0.0.1:20000>
      RequestHeader set "x-webobjects-server-port" "8800"
      RequestHeader set "x-webobjects-server-name" "sogo.mydomain.local:8800"
      RequestHeader set "x-webobjects-server-url" "https://sogo.mydomain.local:8800"
      RequestHeader set "x-webobjects-server-protocol" "HTTP/1.0"
      RequestHeader set "x-webobjects-remote-host" "127.0.0.1"
      AddDefaultCharset UTF-8
   </Proxy>
   ErrorLog /var/log/apache2/error.log
   Customlog /var/log/apache2/access.log combined
</VirtualHost>
- Enable the new virtualhost in Apache and restart webserver:
sudo a2ensite sogo.mydomain.local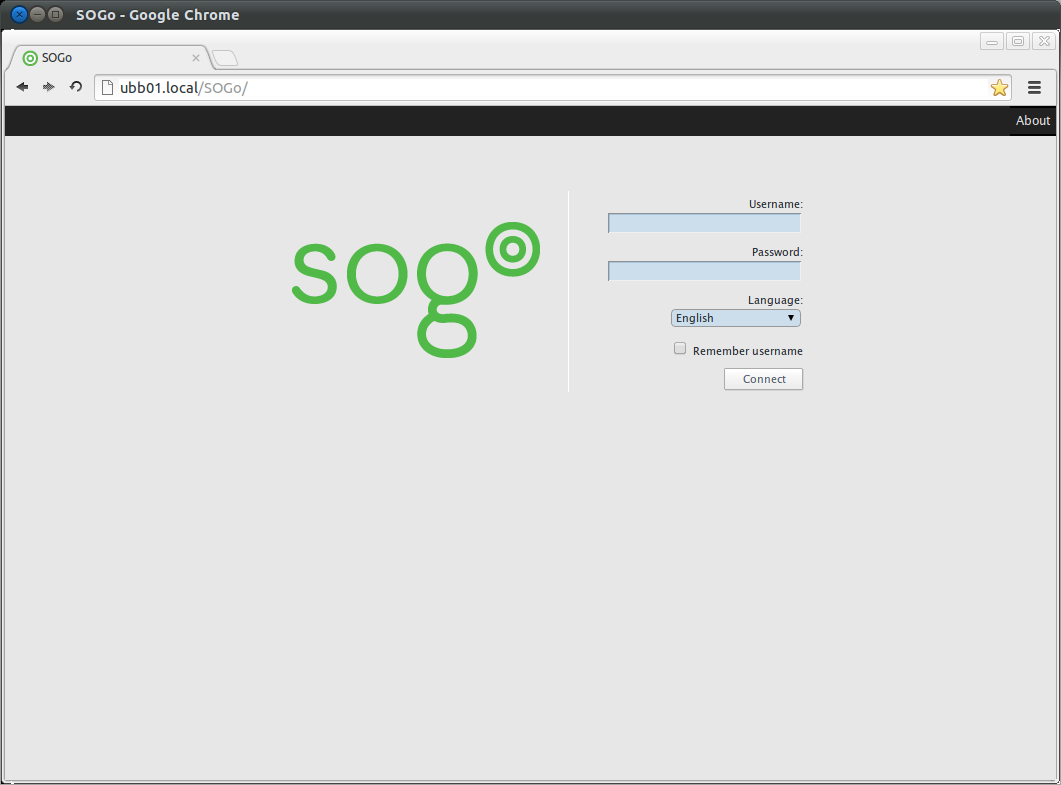
sudo service apache2 restart- You should be able to login to SOGo web interface with you demo users credentials.
- Open a browser and go to:
http://ubb01.mydomain.local/SOGo OR http://sogo.mydomain.local/SOGo
21. Install Virtualization - Oracle VM VirtualBox
- Virtualbox will allow you to install and run virtual operating systems on the server.
- This provides support for multiple operating systems and legacy software running on a single server.
- 4GB of RAM or more is advised if this is used as an option on your server install. 2GB of RAM per operating system is a rough guess to make things work smoothly.
- Download and install the latest version of VirtualBox directly from the website.
- Open a Terminal Window and enter the following :
sudo su
echo "deb http://download.virtualbox.org/virtualbox/debian precise contrib" >> /etc/apt/sources.list
wget -q http://download.virtualbox.org/virtualbox/debian/oracle_vbox.asc -O- | sudo apt-key add -
exit
sudo apt-get update
sudo apt-get install linux-headers-$(uname -r) build-essential virtualbox-4.3 dkms- Install the latest VirtualBox Extension Pack
cd /tmp
wget http://download.virtualbox.org/virtualbox/4.3.10/Oracle_VM_VirtualBox_Extension_Pack-4.3.10-93012.vbox-extpack
sudo VBoxManage extpack install Oracle_VM_VirtualBox_Extension_Pack-4.3.10-93012.vbox-extpack
sudo rm Oracle_VM_VirtualBox_Extension_Pack-4.3.10-93012.vbox-extpack22. Install and configure Remote Desktop - x11vnc
- The default Remote Desktop Server in Ubuntu 12.04 is Vino. This is not ideal for remote administration as it does not provide the security features needed.
- We will install and configure x11vnc as our VNC server. This provides us with basic password as well as SSH tunneling and SSL security options.
- This setup will allow administrators to log in remotely via all popular VNC viewers on Linux, Windows, Mac, iPad, iPhone and Android
- Programs tested and supported : Vinagre, vncviewer, TightVNC, UltraVNC, Chicken of the VNC.
- Install x11vnc and VNC viewers by opening a terminal window and entering:
sudo apt-get install x11vnc vinagre vncviewer- Create a x11vnc password file
sudo mkdir /etc/x11vnc
sudo x11vnc -storepasswd /etc/x11vnc/x11vnc.pass
- Add a new lightdm startup configuration file so that x11vnc server is loaded at startup.
sudo gedit /etc/init/x11vnc.conf - Then add the following and save.
start on login-session-start
script
x11vnc -rfbauth /etc/x11vnc/x11vnc.pass -rfbport 5900 -display :0 -auth /var/run/lightdm/root/:0 -forever -bg -o /var/log/x11vnc.log -noxrecord -noxfixes -noxdamage -nomodtweak
end script
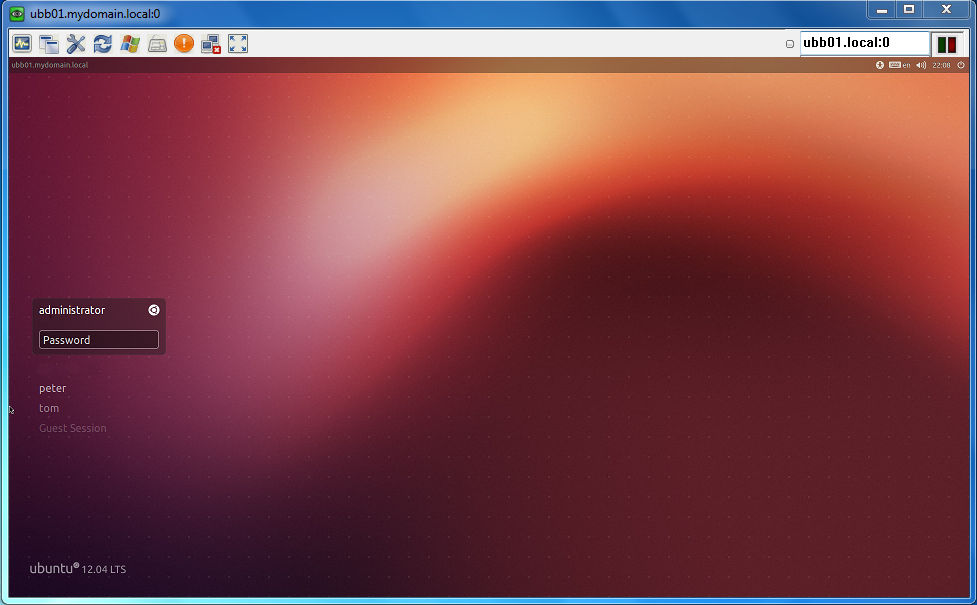
- After reboot you will be able to log into the VNC server on:
Port    : 5900
Display : 0
Host : ubb01.local (or your server IP address or hostname)- You can remove '-rfbauth /etc/x11vnc/x11vnc.pass' setting in the script above and will be able to log in but without a vnc password as security.
- You should be able to connect with your vnc viewer like Vinagre with : ubb01.local:0 or ubb01.local:5900 or via your FQDN at ubb01.mydomain.local:0 or ubb01.mydomain.local:5900
- You will also be able to securely connect using SSH tunneling specifying the tunneling host as localhost.
- You can do this in Ubuntu with vncviewer with the via command :
vncviewer -via user@host locahost:0- In our example you will be able to connect as administrator to the server from another Ubuntu client machine (vncviewer installed) with
vncviewer -via administrator@ubb01.local localhost:023. Install VPN - LogMeIn Hamachi | Haguichi
- Follow these instructions : How to remote login, access and control computers using LogMeIn Hamachi and Haguichi on Ubuntu 12.04
24. Install Instant Messaging and VOIP Server - Openfire | Spark
- Follow these instructions : How to setup an IM / VOIP server using Openfire on Ubuntu 12.04
25. Backups - Ubuntu One | Déjà Dup
- Ubuntu One and Deja Dup is installed by default in Ubuntu 12.04.
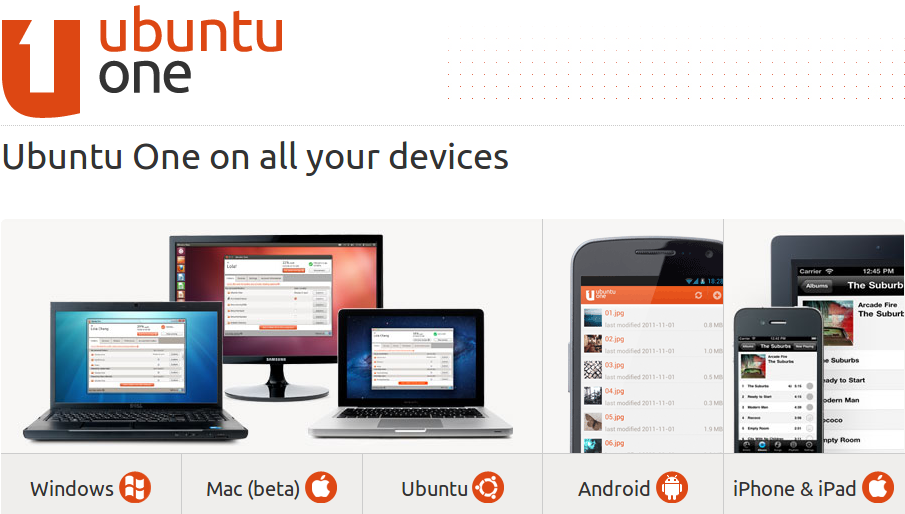
- Ubuntu One is an excellent cloud backup, storage and sharing solution for small and medium sized business using a mixture of platforms and devices.
- Ubuntu One supports Ubuntu, Windows, Mac OSX, iPhone, iPad and Android.
- To get started on Ubuntu - Click on the Ubuntu One icon on your desktop to create an account and get 5GB free cloud backup storage.
- To setup automated backups you can follow this excellent guide on How to Back Up Ubuntu the Easy Way with Déjà Dup
- Tip: You can only backup the shared Ubuntu One folder in your Home direcotry or files owned by the current logged in user to Ubuntu One. So if you need to backup other users files and folders, use Duplicity and Cron Jobs to create encrypted, incremental backups of all files and folders to the Ubuntu One folder and Sync.
- Tip: You can also use Ubuntu One Headless to set up Ubuntu One from the command line.
26. Server Security


Comments
Hi. Thanks for a great
Submitted by Anonymous (not verified) on
Hi, same problem here. A
Submitted by Anonymous (not verified) on
i found adding sudo -u sogo
Submitted by ian (not verified) on
what is the sogo admin
Submitted by wotsit (not verified) on
See sogopasswd in
Submitted by The Fan Club on
You can do it by adding sudo
Submitted by The Fan Club on
My name is Ronald. Am new
Submitted by RonaldSig (not verified) on
Thanks
Submitted by Timo (not verified) on